How to Create and Customize a Gantt Chart in Excel: Project Managers Guide.

I am a Technical writer and IT project Manager looking to expand my skills and make unique connections... Meet Ruth!
Asides from the familiar functions; Microsoft Excel has an amazing Project Management tool that can be used to keep track all aspects within a project scope. Here’s how to create and customize it.

Project Management involves a lot of variables to monitor including dependencies. This is why a Gantt chart is required as it helps to monitor tasks and timelines.
You can create a Gantt Chart in Excel and customize it to fit your project requirements. Also, using Excel, you can integrate this Gantt Chart into other Project Management software.
In this article, you'll learn how to create a Gantt chart from scratch using Microsoft Excel and how to customize it to fit your project scope.
WHAT IS A GANTT CHART?
A Gantt Chart is a horizontal chart used in project management to graphically represent schedules, access deadlines and track the progress of a project.
HOW TO CREATE A GANTT CHART
Now we have clearly explained what a Gantt Chart is, We will now proceed with a step-by-step guide on how to create and customize the Gantt chart:
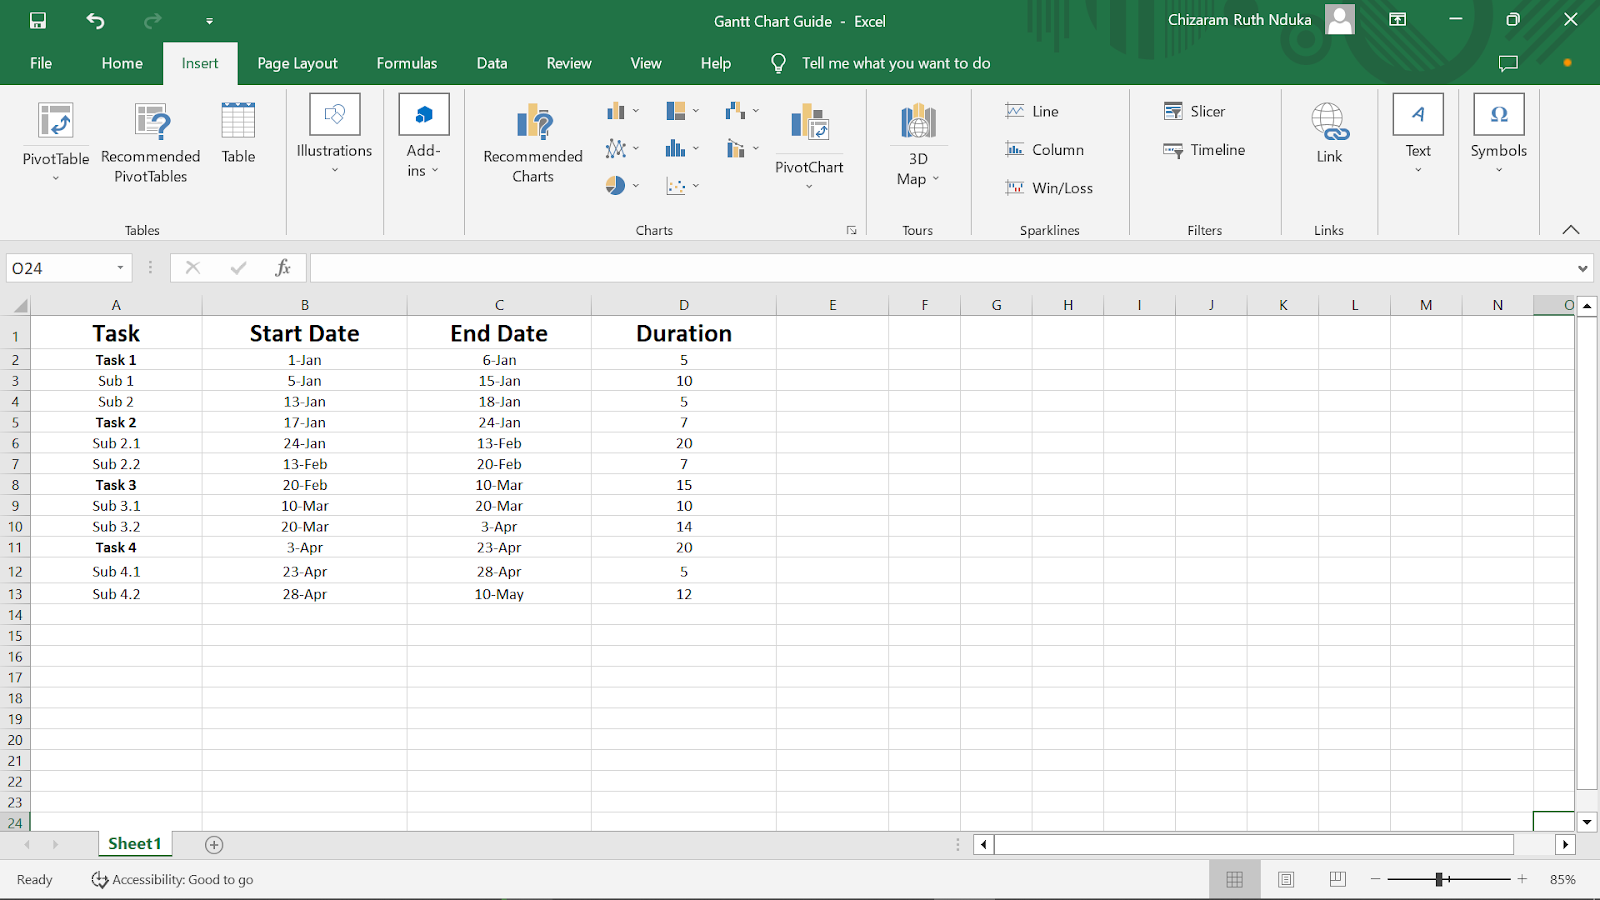
a. Prepare your Project table
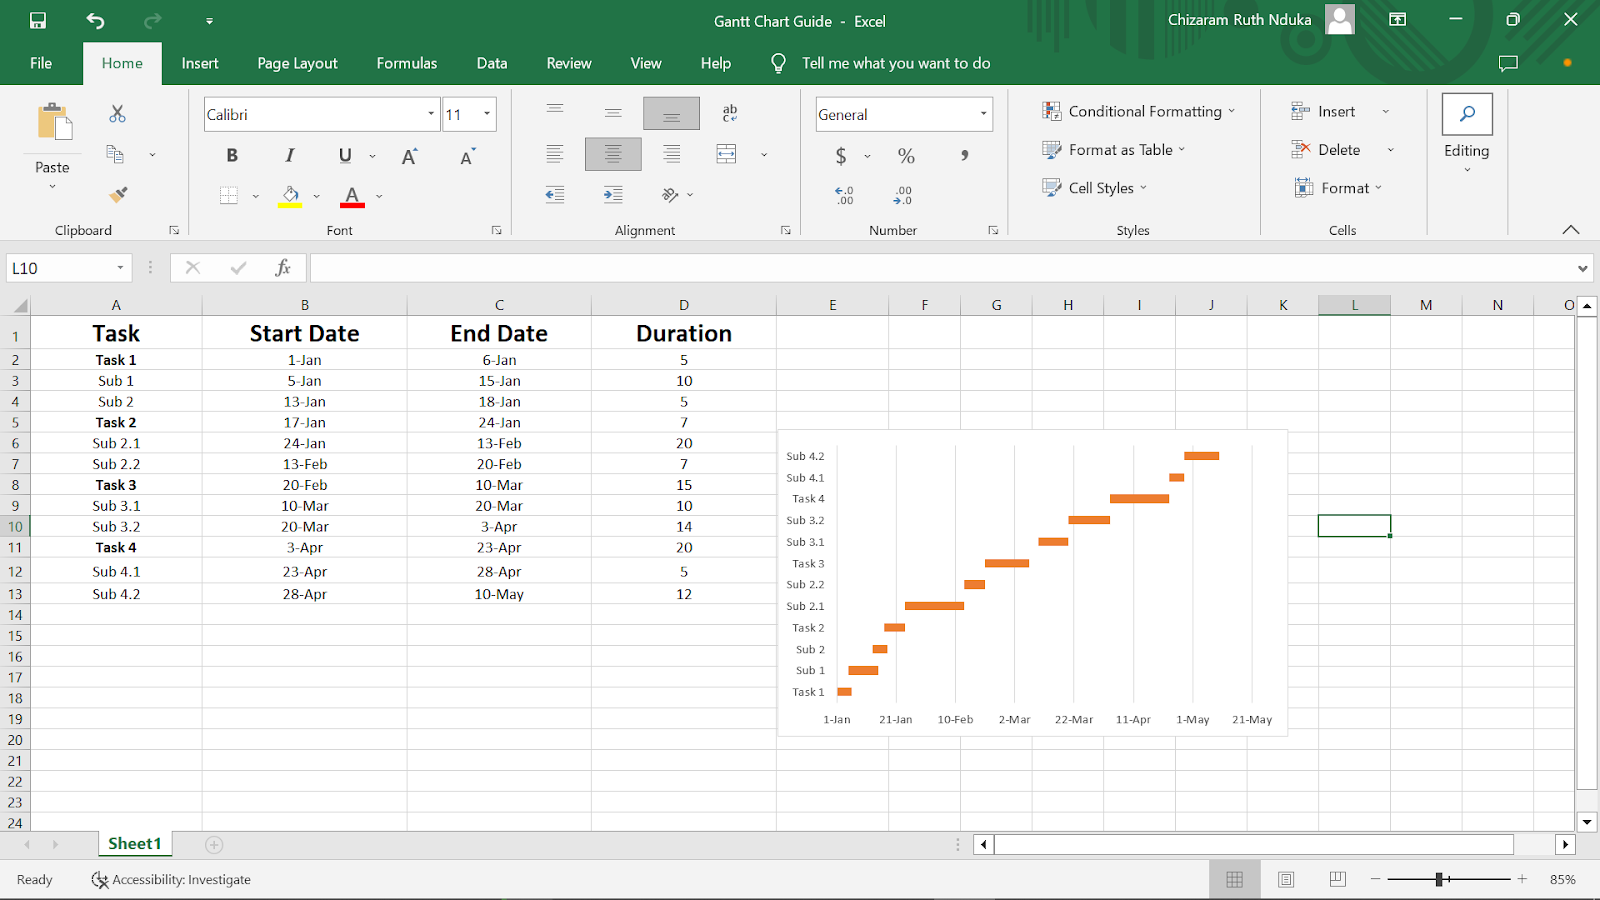
Before creating the Gantt Chart, you need to prepare the data for the project. Basically, this data should contain the task name, start date, end date, and duration arranged in a tabular form with clear headings for each column and role.
- b. Create a Stacked or Excel Bar Chart
After confirming the data, prepare a Stacked Bar Chart by clicking on the insert tab and select the Stacked Bar Chart option in the 2D bar section. This chart will be the bedrock of your Gantt chart.


- c. Customize your Bar Chart
Now that you created your Bar Chart, let's customize little to include some more data. Follow the steps below to begin:
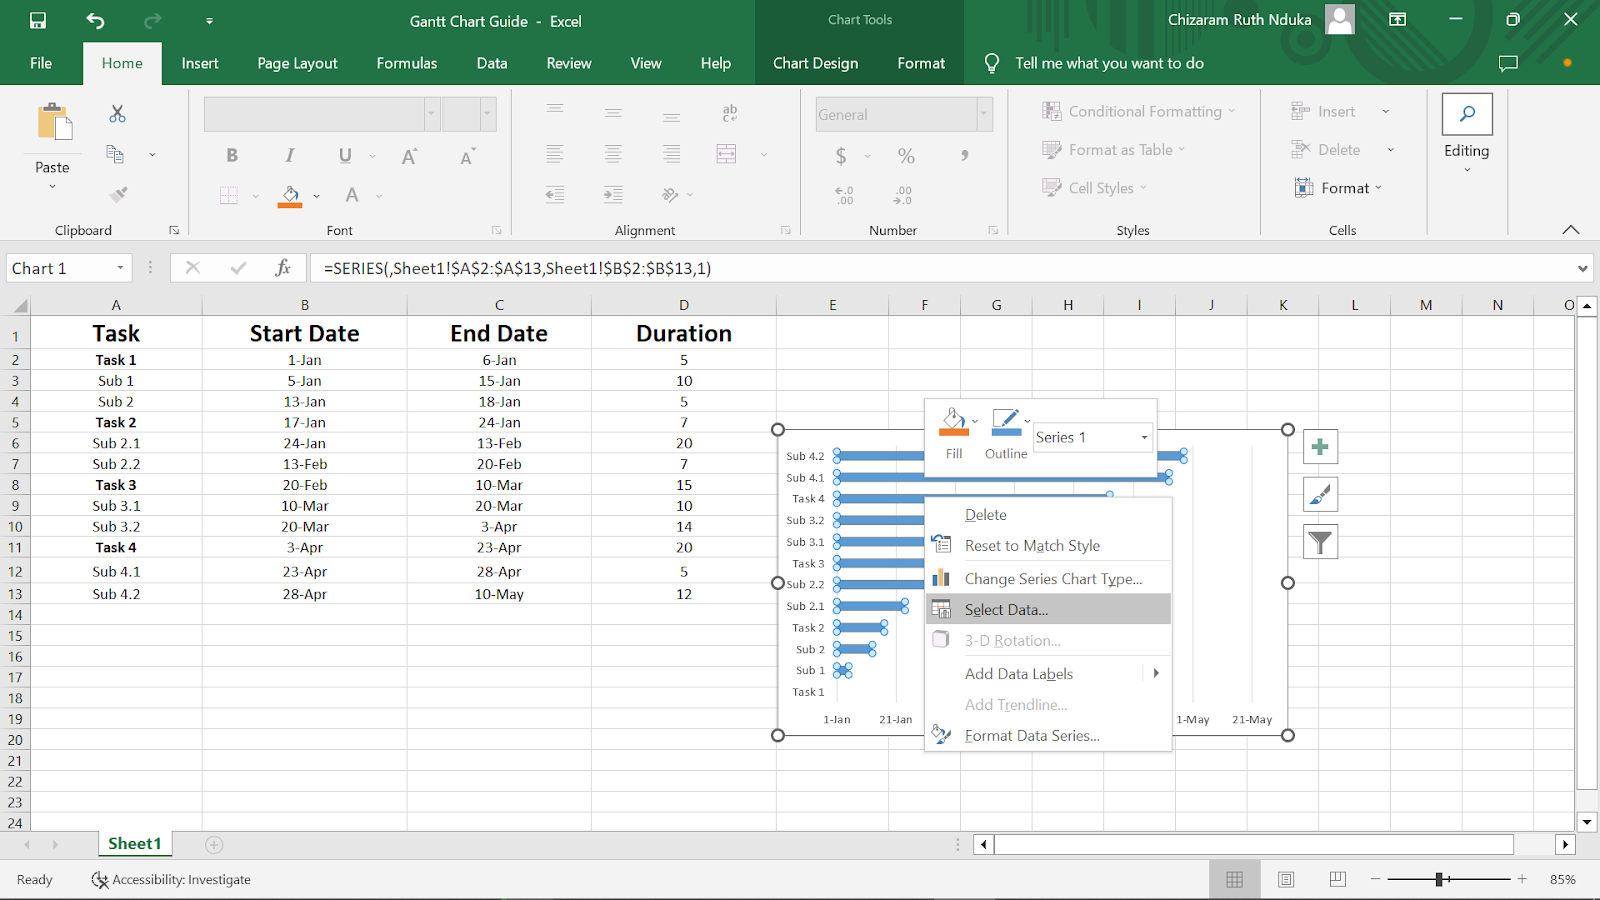
i. Add task names
Click on the Y-axis on the chart(where the task names should appear). Right-click on the axis and choose Select Data. In the window, select Edit on the right side. Finally, select the cell that contains task names.

ii. Add Duration
Right-click on the axis and choose Select Data. In the window, select Add. Finally, select the cell that contains Duration/Timeline.
iii. Format bars
Select the bars in the chart and go to the format tab. In this section, you can change colour, border and fill options.
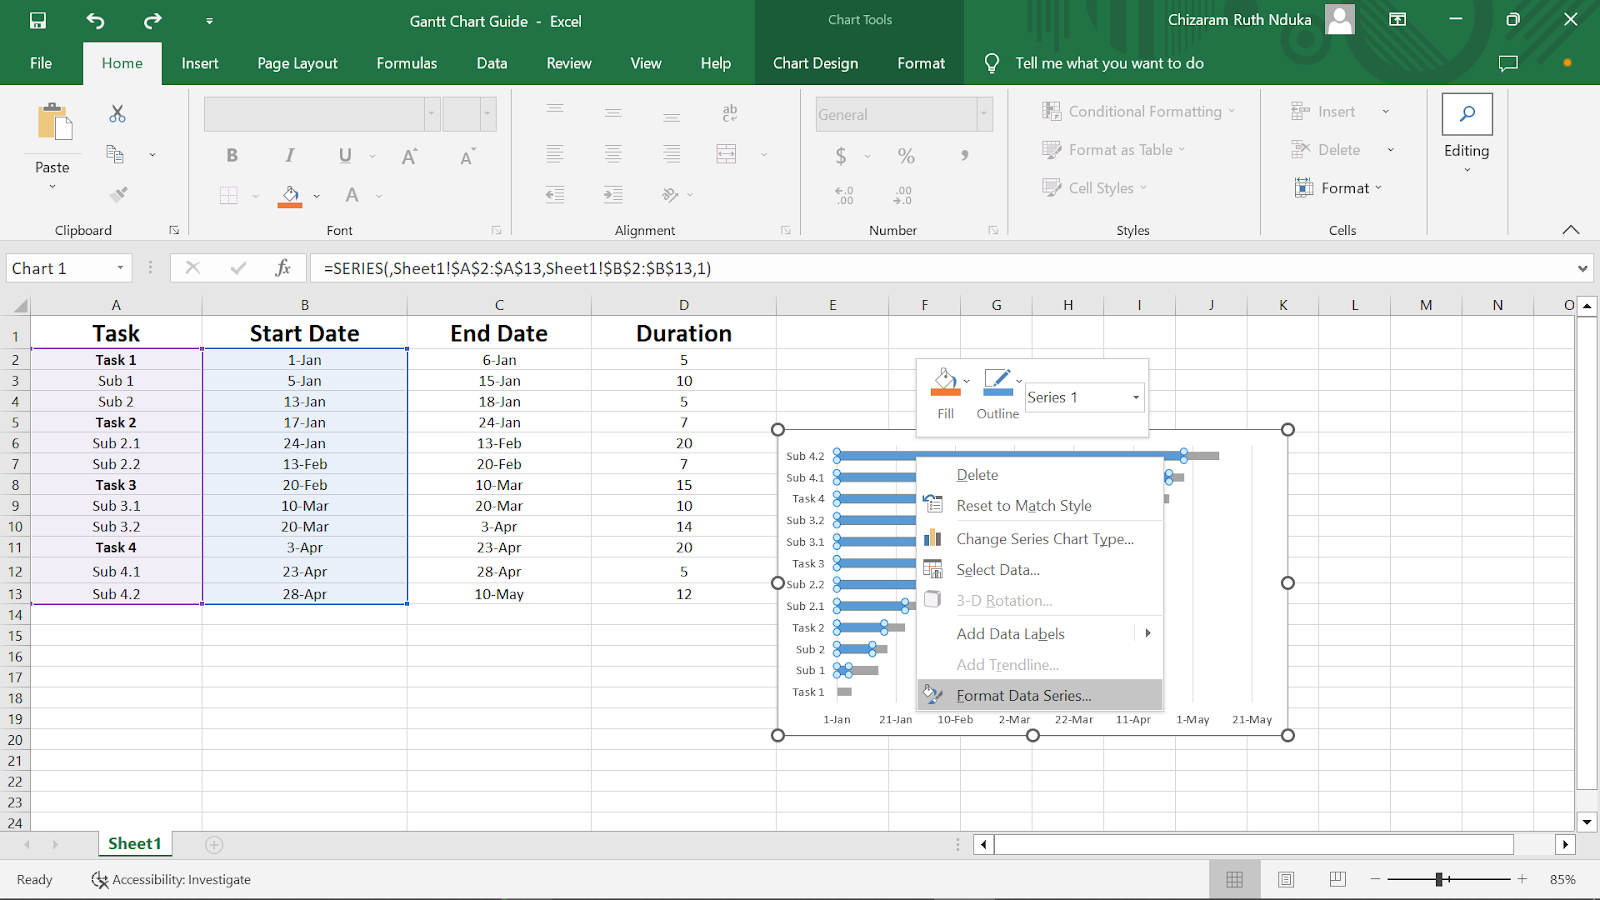
These are only a few customizing options. However, you can explore and find many more.
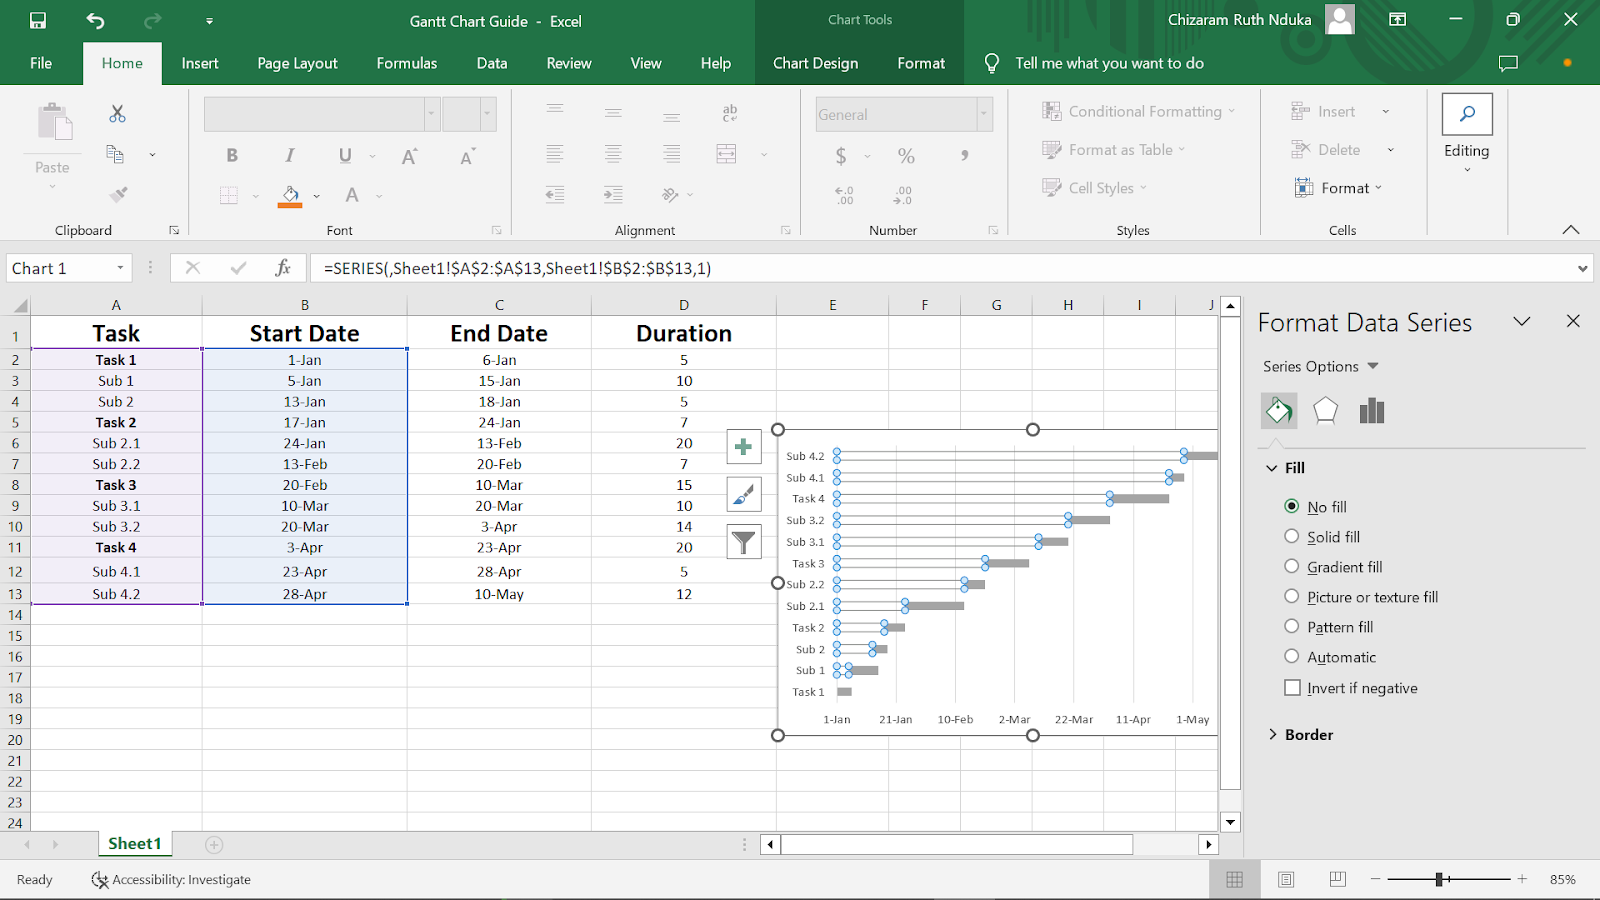
d. Format the Chart
The next step is to convert it to a Gantt chart. To do this: Right-click on the bar. Select the Format Data series. In the fill section, select No fill.
If in reverse order, click on the task panel. In the dialogue box, click on the categories in the reverse order option. Click OK.


Through this guide, you can create a Gannt chart to help you track every aspect of your project scope. Depending on the scope of your project, you can customize it to fit your needs. Now you can manage your project effectively and seamlessly.


